16 Mar 2016

What is Kivy?
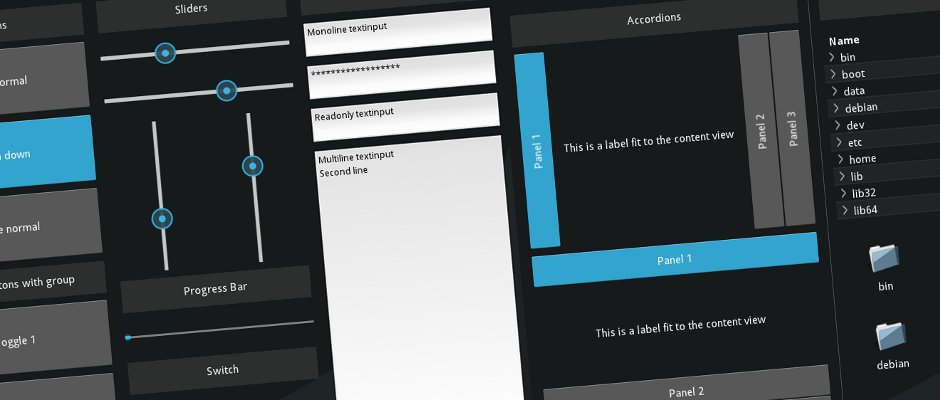
Kivy is an amazing, cross-platform user interface toolkit for python. It enables you to create sleek, stylish, modern and mobile-friendly interfaces like these shown below.
Using it with Raspberry Pi:
Amongst Windows, Mac, Linux, Android and iOS, Kivy is able to run well on a Raspberry Pi. I have been interested in getting it to work on the Pi since the release of the offical Raspberry Pi touchscreen a few months ago.

Whilst kivy works well on the Pi, installation is far less straightforward; requiring the manual entry and installation of dependencies. This prompted me to write a useful script that automates the entire process (based upon the documentation by Kivy and Matt Richardson of the Raspberry Pi Foundation).
Installing Kivy
As mentioned earlier, with the script, installing Kivy is easy. It will however take some time to run, as many dependencies need to be satisfied, so I'd reccomend making a drink and finding something else to do whilst the script runs :)
First of all, you'll need to clone the repository on GitHub:
git clone "https://github.com/ElectronicsGeek/Kivy-Raspberry-Pi-Installer"
After that, you'll want to use chmod so that you can execute the script. Simply type:
chmod +x install_kivy_rpi
Following this, run the script using sudo:
Then, be paitent!
OPTIONAL: Setting up the Offical Touchscreen
If you intend to use Kivy with the official Pi touchscreen, you may wish to follow these steps.
Open the kivy configuration file with nano or other text editor of choice:
And enter the following in the [input] section
mouse = mouse
mtdev_%(name)s = probesysfs,provider=mtdev
hid_%(name)s = probesysfs,provider=hidinput
What's next?
In the next article, I'll go through how to get started with Kivy! Stay tuned!
In the meantime, you may want to check out Alexander Taylor's excellent Kivy Crash Course video series on youtube
Image Credits:
Official Pi Touchscreen - Pimoroni
30 Oct 2015
On the 24th October, myself and my friends Ben Dunicliff and Will Bednall attended this year's Derby Mini Maker Faire, where we exhibited an assortment of projects under the title “The Three Makerteers.”

I was showing off my IoT project Socialights. Essentially, it grabs social network data from Gmail, Twitter and Facebook and when the logged in user gets notifications, a corresponding 'beacon' lights up. I was very pleased to finally exhibit it, as I was unable to in the past due to it being a GCSE exam piece. There was plenty of interest from the visitors of the Faire who were eager to see it in action and did so by sending me tweets and emails throughout the day.

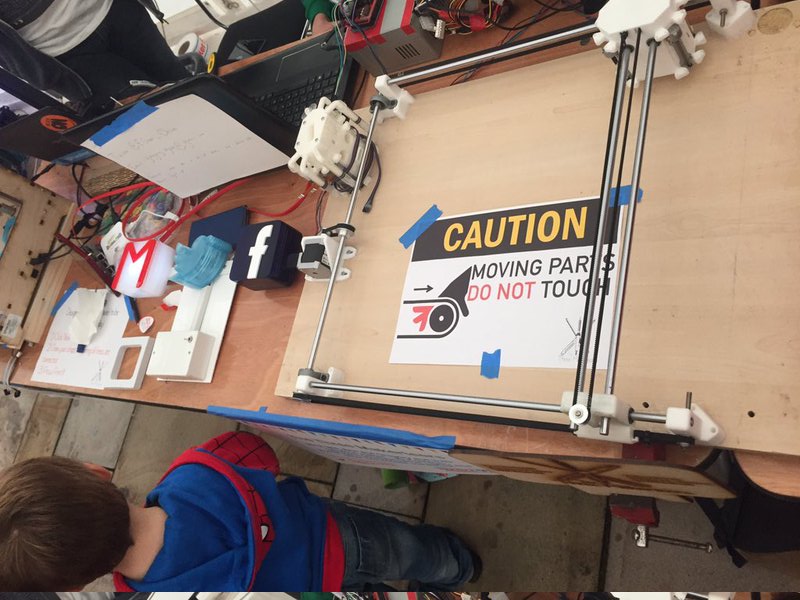
Ben was running a sort of 3D printing workshop using his recently constructed Ultimaker printer. Using the very nifty Doodle3D router and a Raspberry Pi combined with the new 7 inch touchscreen, we set up a makeshift kiosk where people could doodle 2D designs on the screen (such as simple polygons, or their name) and watch the printer extrude them. This was particularly popular. Many people actually commented that it was the first time they had ever seen a 3D printer in action, so to be able to create something and take it home must've been a great source of satisfaction for them!

Finally, Will brought his fantastic work-in-progress, DIY pick and place machine with him. At the time of the faire, it only moved around its bed. Nonetheless, it was incredibly cool! Myself and Will hacked together a little script during the faire which moved the head of the machine to random coordinates on the bed. We then attached a pen and watched it create a drawing. Essentially, we made a plotter and the results were pretty damn awesome. Sadly I have no photos of this, so you'll have to take my word for it!
Outside of our stand, there were some really amazing projects on show. In fact, it would've been great if I'd had some more time to look at them all properly! One really cool project was Daniel Bailey's C88 computer.

Using an FPGA, he created an 8 bit, 8 address microcomputer, programmed in the most lo-fi possible way; toggle switches. FPGAs are fairly expensive, so Daniel has also created a JavaScript emulator of his project which is definitely worth a go if you're interested. It's really rather cool!
At the end of the faire, I was able to fulfil my lifelong ambition of riding in a human sized BigTrak. Yes, you heard me correctly. Hitchin Hackspace created a sit-in BigTrak, dubbed the BigHak, which they allowed me to ride in. Cheers guys!

It was brilliant to meet up with fellow makers, show the public what we'd all been working on and see some truly awesome projects. Overall, it was a really successful Maker Faire. A big thank you and round of applause to the Derby Museums team and all the volunteers! I'm very much looking forward to next year's faire.
Photo Credits:
Will's Pick and Place machine - Sheffield Hardware Hackers and Makers
C88 photo - Daniel Bailey
15 Apr 2015
NOTE: Whilst this article specifically targets Ubuntu, I reckon you would probably have success on other distros, too. Keep me posted in the comments.
I recently installed Ubuntu on my laptop and I'm very pleased with it, so pleased, in fact, I haven't booted into windows for a good few weeks. I did however run into one small problem when setting up - Spotify was not installed.
Having used and been thoroughly disappointed by the Spotify Linux client (which Spotify themselves admit is "experimental") in the past, I decided I needed to access Spotify in an alternative way.
You Will Need:
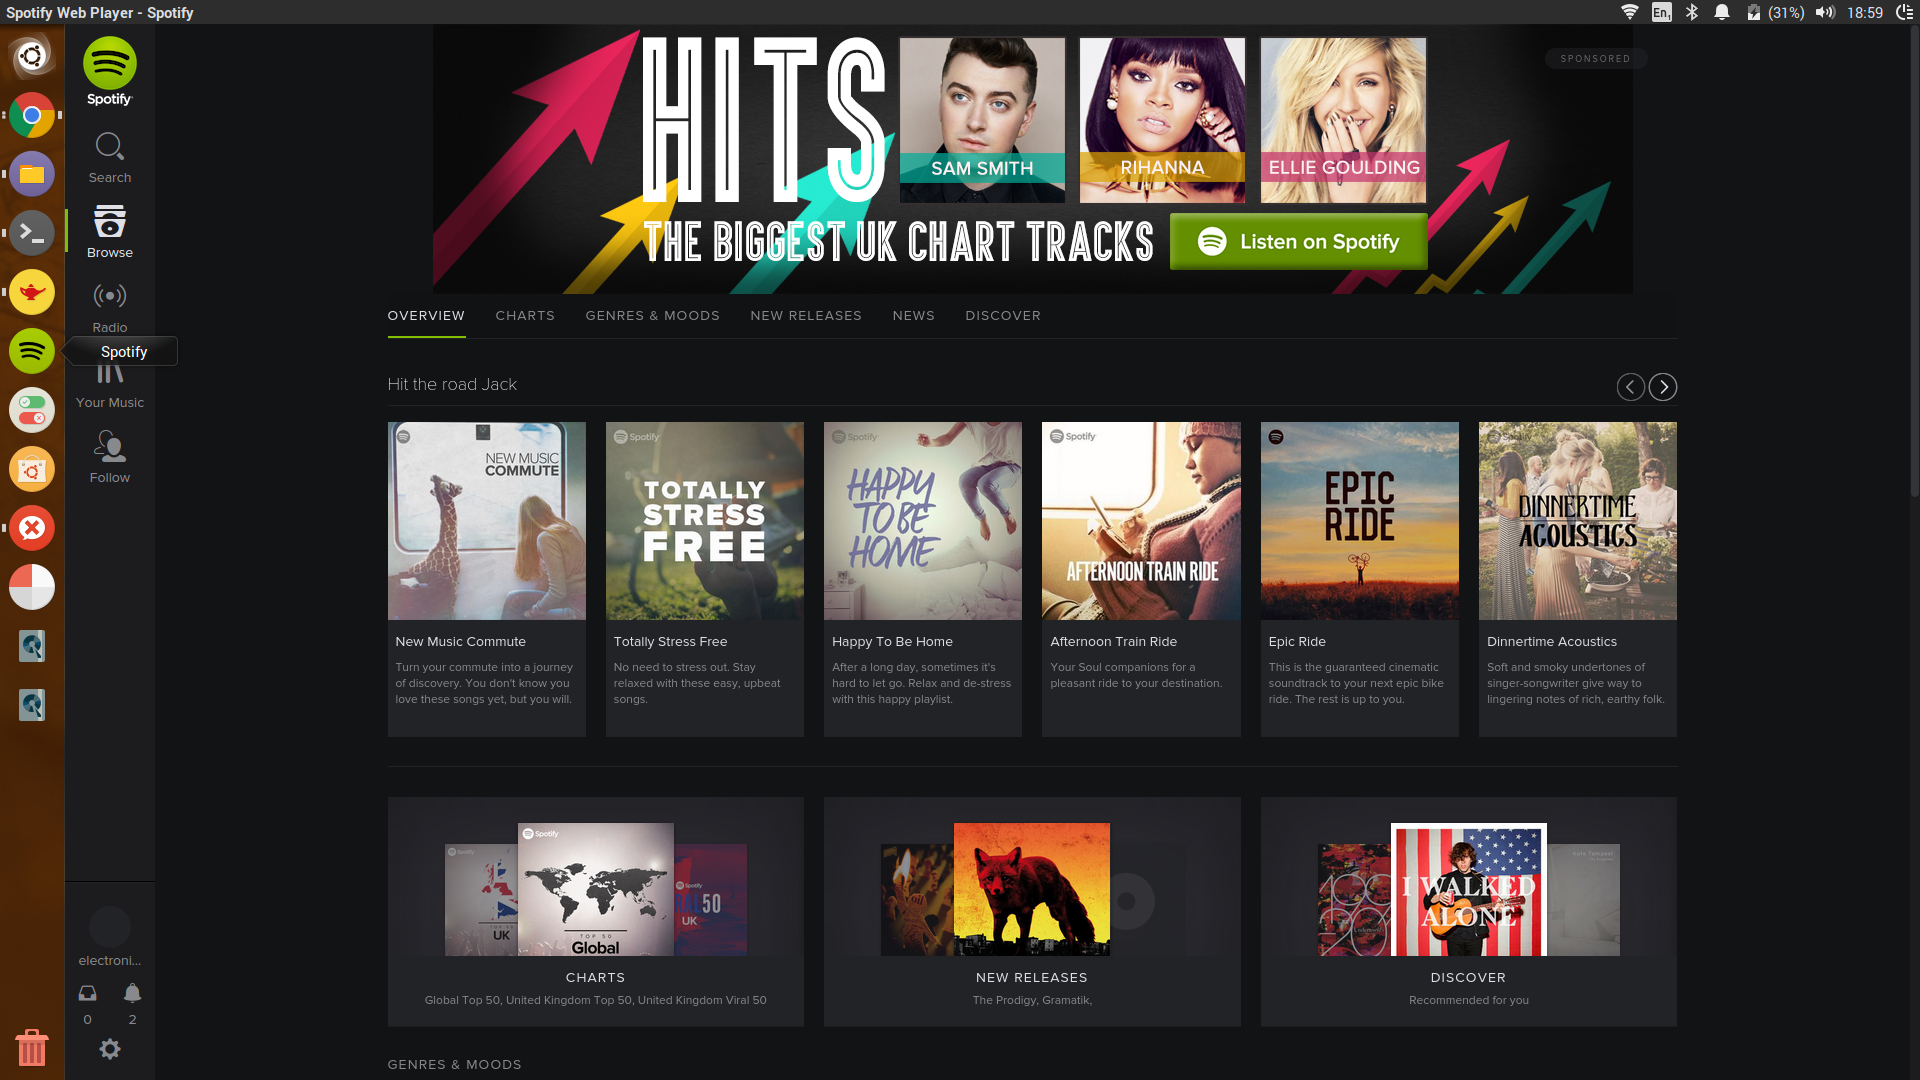
The Spotify web client was the way forward! To access the web client, obviously one must use a web browser.
If you close all instances of Chrome and type this into your terminal, you should notice that a Chrome window opens, albeit with no tabs and controls. This is perfect, because it "feels" more like a standalone application.
google-chrome --app=https://play.spotify.com
Easy :)
Now, we need to turn this into an actual "application" to run in the Unity launcher. Thankfully, this is also easy. Open a terminal and type:
cd /usr/share/Applications
Then type:
sudo nano spotify.desktop
It is very important that you type "sudo"
[Desktop Entry]
Version=1.0
Type=Application
Name=Spotify
GenericName=Web Music Streamer
Comment=Listen to music using Spotify
Icon=spotify
categories=Audio;Player

Exec=google-chrome --app=https://play.spotify.com

Terminal=false
Once that's done, press "Ctrl + X" and hit "Y"
Now type "Spotify" into the searchbar and if all has gone to plan, it should be there. Click on it and a Spotify Chrome window should open.
You might even want to add it to your quick launch applications on the main Unity bar, as I have done.
08 Feb 2015
I'm back in the blogging game!
Following a short stay on Blogger, due to its limitations, and an even shorter stay on Tumblr, because I just didn't 'get it,' I've now decided to start blogging again.
My blog now resides on GitHub Pages. I feel this really makes sense, since I'm a programmer and indeed plenty of programmers use GitHub. It also satisfies my desire to have complete and utter control over the blogging process; HTML/CSS customisation and the like. Overall, it feels like a fresh experience.
The theme, by the way is based on the excellent "Hyde" by the Poole project. Over the past week or so, I've been tailoring this theme to satisfy my own purposes - I hope you like it!
My aim for the blog is to show you, the reader, what projects I'm currently working on, perhaps provide some tips and tutorials and maybe even rant a little about the world of technology.
If don't know me, here's a quick introduction:
I'm a 16 year old programmer, maker and electronics enthusiast from the Midlands, UK. I would say I'm very passionate about the above fields and technology in general. Outside of the workshop, I like playing/listening to music, rock climbing and drinking tea!
Welcome aboard.
